

Scenario Creation for Maleme, Crete (Part One)
Creating a scenario is the culmination of all that has been shown in the earlier blogs. The research, order of battle, mapping and graphics are the tools needed to allow the designer to create the actual ‘game’.
That said, there is still significant work and research to do.

When starting to build a new scenario, the designer has to know some salient information. Items such as the date and time of day the operation begins (and finishes) as well as which player ‘moves’ first are key for the initial setup. In addition, any climactic conditions as well as ground state is important and will impact the overall visibility.
Below you can see all the values that are initially entered in the scenario header with the critical ones highlighted in red. The others need to be sorted before the scenario is tested/published but are not a requirement at this point;

With the initial parameters determined, the next step is to lay out one of the combatant sides. I normally start with the defender as they usually begin in a static state with well-defined positions. This is usually where the second round of research comes in. As laid out in the previous blogs on order of battle, we knew the forces that were present but not necessarily where they were at the start of our scenario.
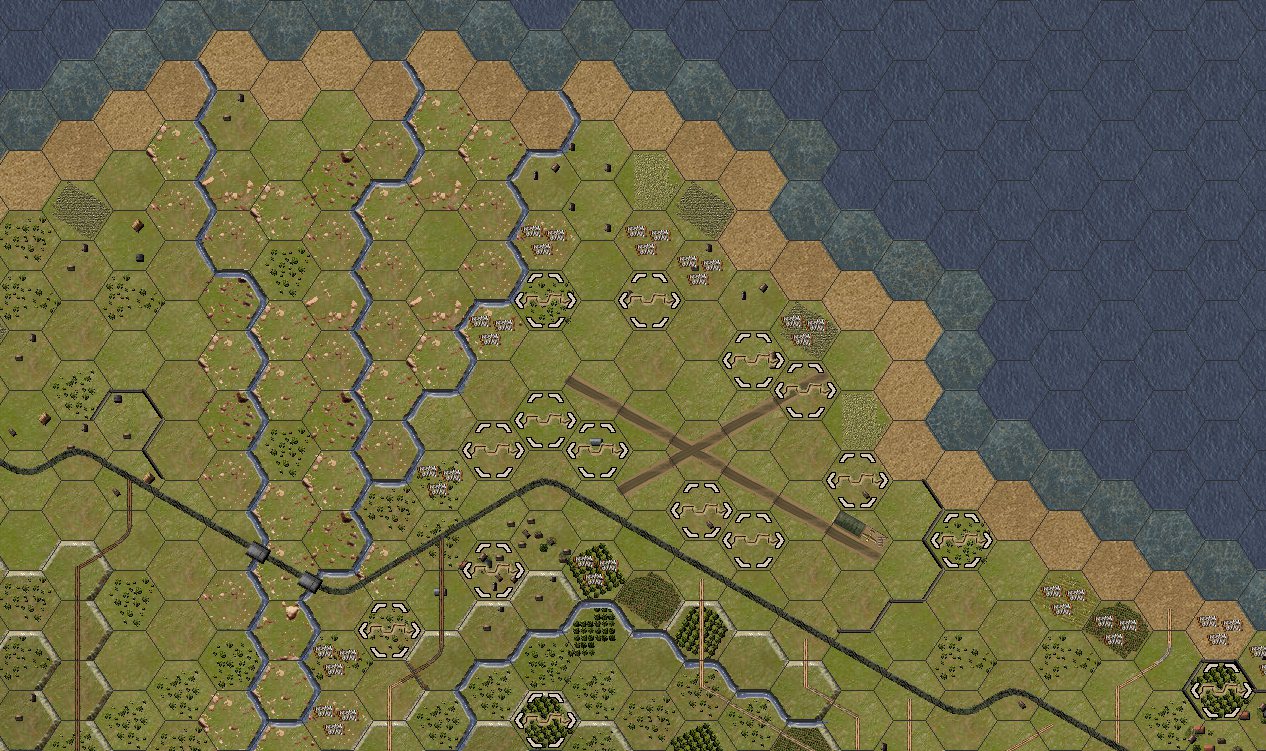
Maps such as the one shown at the beginning of this blog are invaluable (and rare) and simplify the placement of forces. Of interest, the histories published by the Commonwealth and Italy have proven to have some amazingly detailed maps to work off. The importance of this map is that the company perimeters and in some case the actual platoon numbers are identified.

And below are the basic formation groups identified from our source map;

Looking just at the airfield defences. The actual platoon layout is in the following image. Note how the Allied forces are all ‘Fixed’ (other than the AA which is immovable). Fixing these units will prevent the AI or player from moving units before they should be able to. This is usually based off the orders the defenders may have had at the time the scenario starts;

All the defenders are deployed in some form of battlefield improvement. Using the ‘special markers on top’ filter we can see the trenches and wire emplacements that were used around the airfield. Of interest, mines were actually deployed, but never armed for fear of hurting the civilian population (!). There was never time to arm them once the Fallschirmjaegers arrived. The Allied forces were also very skilfully camouflaged and though very heavily bombed for days before May 20th, the actual defensive positions were in the main unknown to the Germans;
To reinforce the fixed status of the defenders, they are also give AI Hold orders. Each company is given this order and it essentially commits the unit to try and hold a defined area. In the following image, C Company has a hold order for all three of its platoons (highlighted in yellow). The red square indicates the ‘centre’ of the defences so the designer can understand where the AI will deploy around. With a hold order the AI defenders will try and stay in their trenches and hold any victory locations nearby;

Here are the actual victory locations for the airfield area. The focus is obviously to clear the airfield’s defences and preventing any counterattacks recapturing any locations. Both the British and Commonwealth objectives are shown and heavier weighting has been put on hexes that the Germans have to clear. Note how the bofors emplacements are only nominal VP’s, while clearing the New Zealand platoons and airfield infrastructure are driven by higher values;

The other critical area is the Point 107/Kavkazia Hill area. The Allied forces setup many of their higher formation assets here with anti-air and anti-shipping guns present. In addition, the 22nd Battalion HQ and the available machine gun platoons were sited with longer lines of sight. The only available local armour was also placed in the olive groves at the foot of the hill;

This area is also heavily weighted from a victory perspective as it was a key objective of the attacking Luftwaffe forces. Utilising different weights of victory points can help the scenario designer designate areas that players (and the AI) should care about.
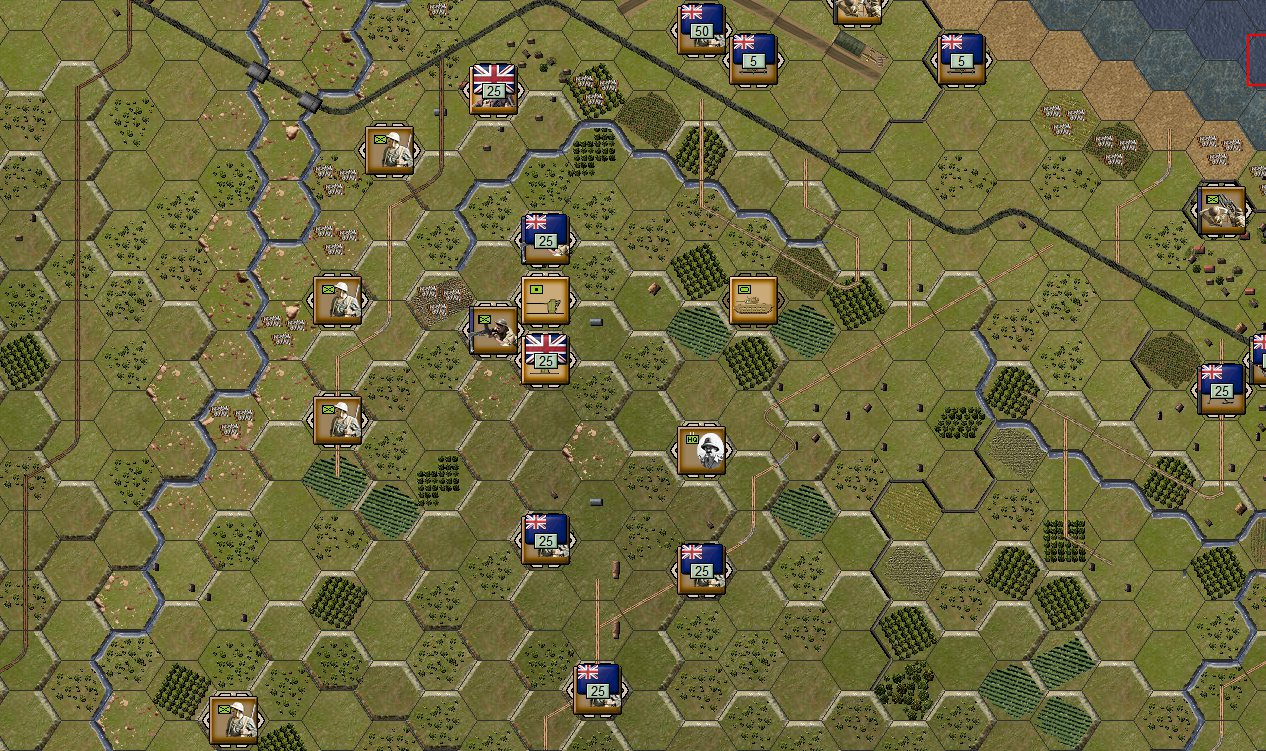
With the two critical sectors setup, the remaining forces from 22nd Battalion (HQ & B Company) are placed on map and all units are dug into emplacements. All units are given AI hold orders which should have them try and defend in place and mount local counterattacks if a contiguous victory objective falls.
Here is the final deployment of the defenders, including victory locations and map labels;

In the next blog, we will cover off the steps and considerations required for setting up the attacking Fallschirmjaegers in our Maleme scenario.


Leave a comment