

Scenario Creation for Maleme, Crete (Part Two)
The previous blog entry was focused on the Allied setup around Maleme. This entry will look at the attacking Fallschirmjaeger (parachutists) and the considerations needed to simulate their arrival.

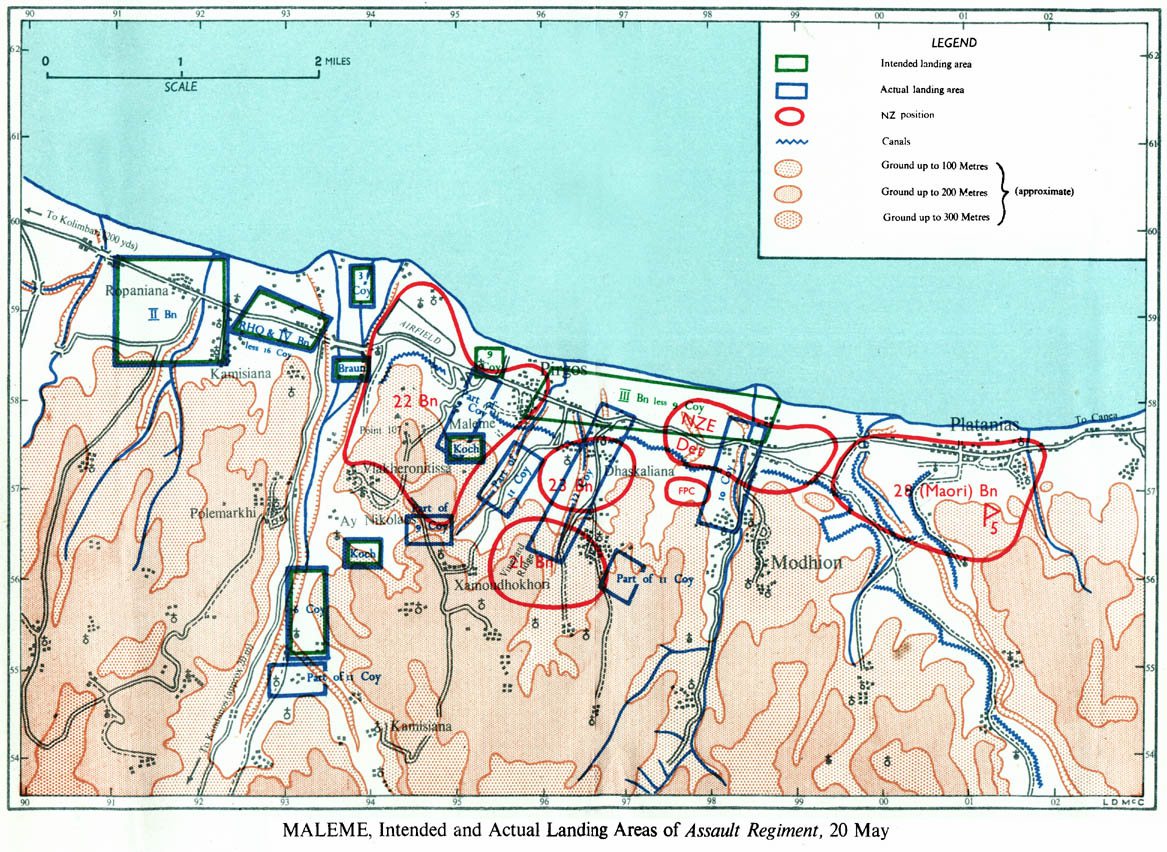
With all the defender’s setup in the scenario, it’s now time to lay out the Germans. The above segment of map is from Davin’s work and covers pretty accurately where the landings were planned and where they actually occurred.
As mentioned in the German Order of Battle post, the primary unit that led the initial assault at Maleme was the Luftlande-Sturm-Regiment 1 (in English the 1st Air Landing Assault Regiment).
This unit was an over-strength regiment with four battalions. The I Battalion was glider borne troops, II & III were fallschirmjaeger and IV Battalion was the support/heavy weapons teams.
The German plan was simple. After an hour long attack by Stukas and other aircraft, a pre-emptive glider assault would take out the anti-aircraft defences around the airfield. The hope was that the dive bombers had suppressed the AA guns and the gliders would silently arrive and surprise the defenders.
After the glider assault, III Battalion to the east and II & IV Battalions to the west would parachute in and attack the airfield from both directions.
The operation had been planned on the assumption that the British had only 15,000 men on Crete - unfortunately that was out threefold with over 48,000 defenders available. Though carefully reconnoitred by air, many of the New Zealand 22nd Battalion positions were unknown to the attackers.
It’s commander, Lt Colonel Leslie Andrew actually flew over his battalion a number of times before May 20th to ensure that nothing was visible form the air. This action was to pay dividends for the defender and take a terrible toll on the attackers.
As mentioned the I Battalion was to lead the air assault with glider borne troops. Unfortunately, the demand for AA suppression across the island resulted in only the 3rd & 4th companies being available at Maleme. These two companies contributed five platoons with a further two being created out of HQ elements of the Sturm Regiment led by Hauptmann Braun. Seven platoons in total were to arrive in the initial wave. Heavy weapons troops (MG & mortar) were to arrive with the I Battalion Commander Major Koch.
Here is Davin’s complete map for the landing around the airfield. Note - a green box was the planned landing zone and blue the actual arrival;
The below map section shows the planned landing areas for each glider team;

All the glider borne troops landed in their designated areas other than the 2nd platoon of 4th company which unfortunately landed in front of the makeshift defences at the RAF camp.
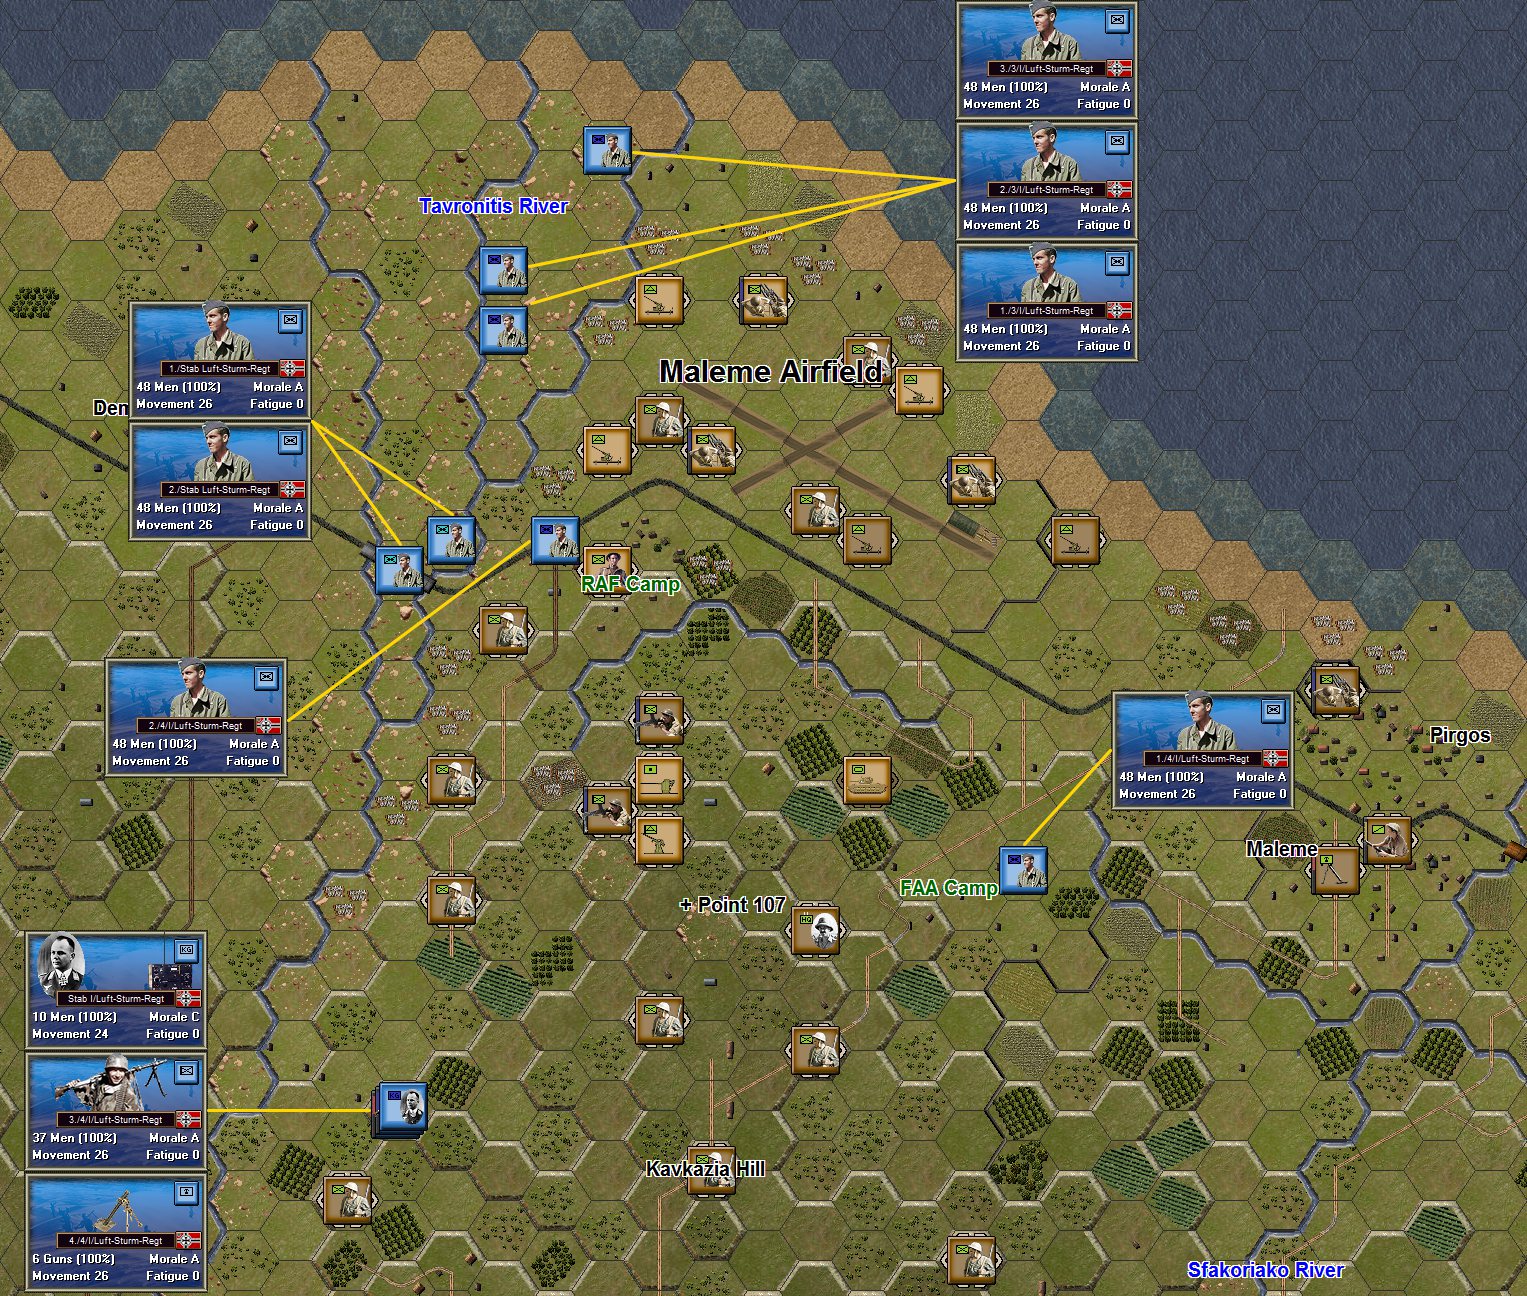
All the glider troops were laid out in the scenario as per the below;
When placing troops as reinforcements, there are a number of different options that can be chosen. For glider (and parachute) landings, scatter and protection are important considerations. Below you can see the reinforcement dialog for the arriving glider troops;
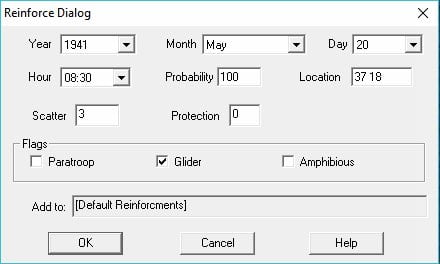
With the above settings, the gliders will arrive (100% probability), they can scatter up to three hexes from the designated arrival hex (shown in location) and they have no protection radius (zero hexes). Protection will break any defenders within X hexes where X equals the protection value. In this case there is no protection for the arriving troops. In fact, there is a chance that the Germans may land in the same hex as the defenders. When this occurs, the reinforcement will take up to 90% casualties and be placed in one of the six adjacent hexes. The landing units will also take a certain number of losses due to the nature of glider and parachute operations and these losses can be exacerbated if the terrain landed in is anything but clear. The scatter values are only set at three as the actual arrival points are known. In other landing scenarios such as the US airborne forces in Normandy, higher values are used. One thing to note, the higher the scatter value, the higher the potential loss on landing - representing the challenges of recovering dispersed forces.
The Germans suffered heavy losses within the teams that landed near enemy troops. The short command range for Major Koch (all Fallschirmjaeger battalions have a ten hex range) impacts the speed of recovery of the glider platoons.
Shortly after the glider troops, the Fallschirmjaeger began to arrive and jump in their respective zones. Visibility was limited due to dust and smoke from the previous Luftwaffe attacks and unfortunately that plus the inability of the glider troops to take out the AA positions resulted in mixed landings.
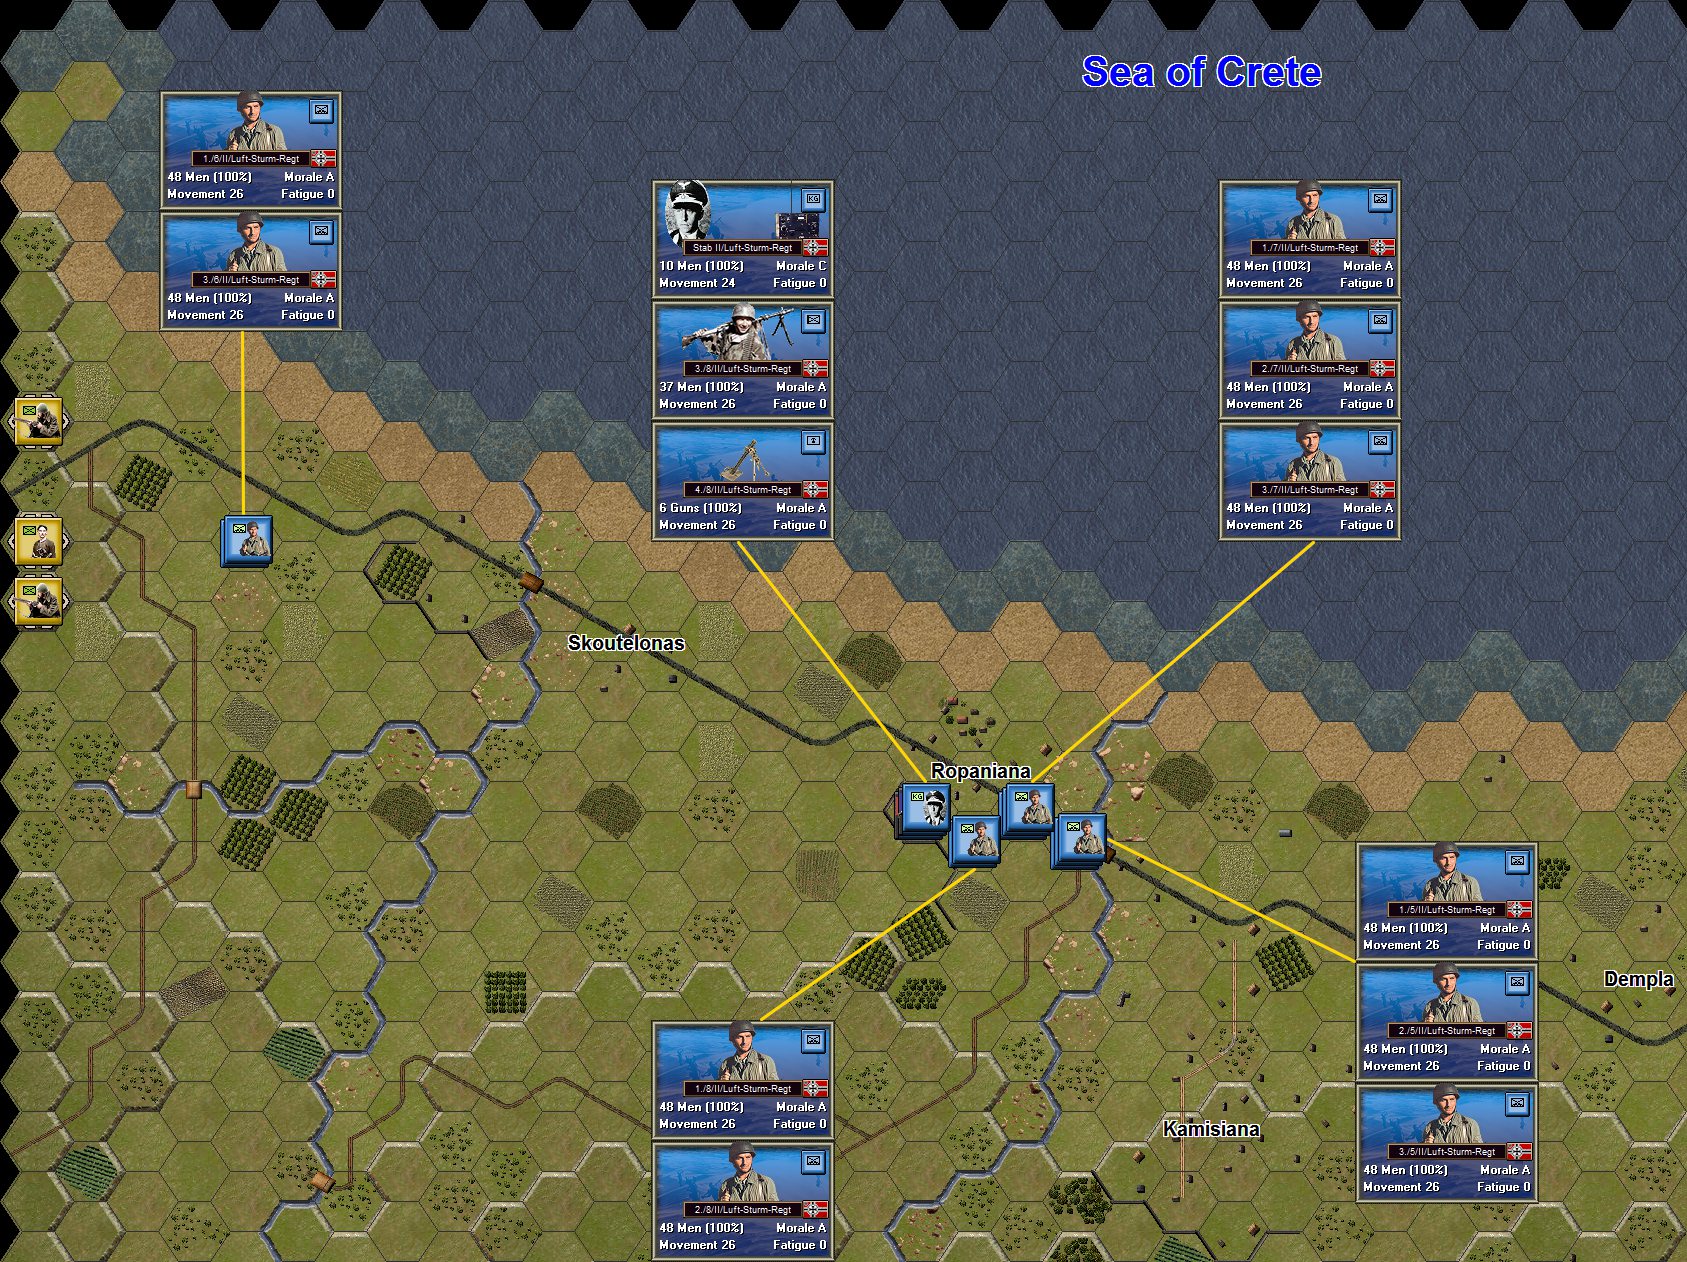
The Sturm Regiment HQ forces as well as IV Battalion landed to the west of the airfield between Ropiana and Dempla. Though there were losses due to the terrain, the Allies did not have sufficient troops to protect west of the Tavronitis River.

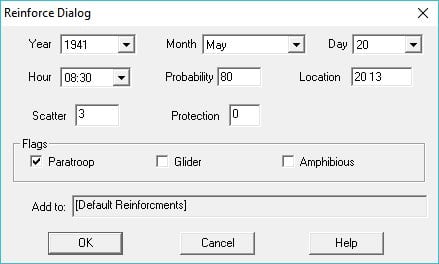
Like the glider forces the Fallschirmjaeger are set with a scatter value of three, but importantly the probability is set for 80%. The Germans had serious problems co-ordinating the arrival of their troops and the reduced probability provides some randomness on what arrives each turn. Normally, 80% will see most forces arriving within two turns.
The Regimental HQ, IV Battalion and the Fernmelde (communications) company arrived in the following configuration;

It’s obvious a lot of support platoons arrive in the same hex. With 3 hex scatter they usually scatter around the focal point.
The next significant unit arrives at 9am (thirty minutes after the start of the scenario). II Battalion was also fortunate to land to the west of the Tavronitis River and only suffered from the usual jump casualties.

Unfortunately, heavy dust thrown up by the successive flights of JU transports resulted in the II Battalion arriving piecemeal. This staggered arrival is represented by the arrival probability set at a value of 50%, This can result in it taking up to four turns for all the battalions platoons to arrive.

Here are Major Stenzler’s II Battalion landing disposition. You can see how cohesively the battalion landed. The 6th company was detached to act as eastern flank guard;
The II Battalion was to become the major force to clear Kavkazia Hill/Point 107 due to their ability to reorganise away from enemy observation and fire.
Major Sherber’s III Battalion was the last Sturm Regiment unit to arrive at Maleme, beginning at 10am. It was also a victim of delayed departure in Greece, but was able to regroup in transit and arrive over the target in a timelier fashion. Unfortunately, with the defenders well aware of the German arrival, many of the transports were fired on and instead of dropping parallel to the coast, companies were dropped in a north/south pattern. Many of these troops were to land amongst the defender’s positions;

Unlike Stenzler’s battalion, Scherber’s more orderly arrival is represented by the higher probability (80%);

Below you can see how Scherber’s battalion landed. 10th company and part of 11th are off board to the east;
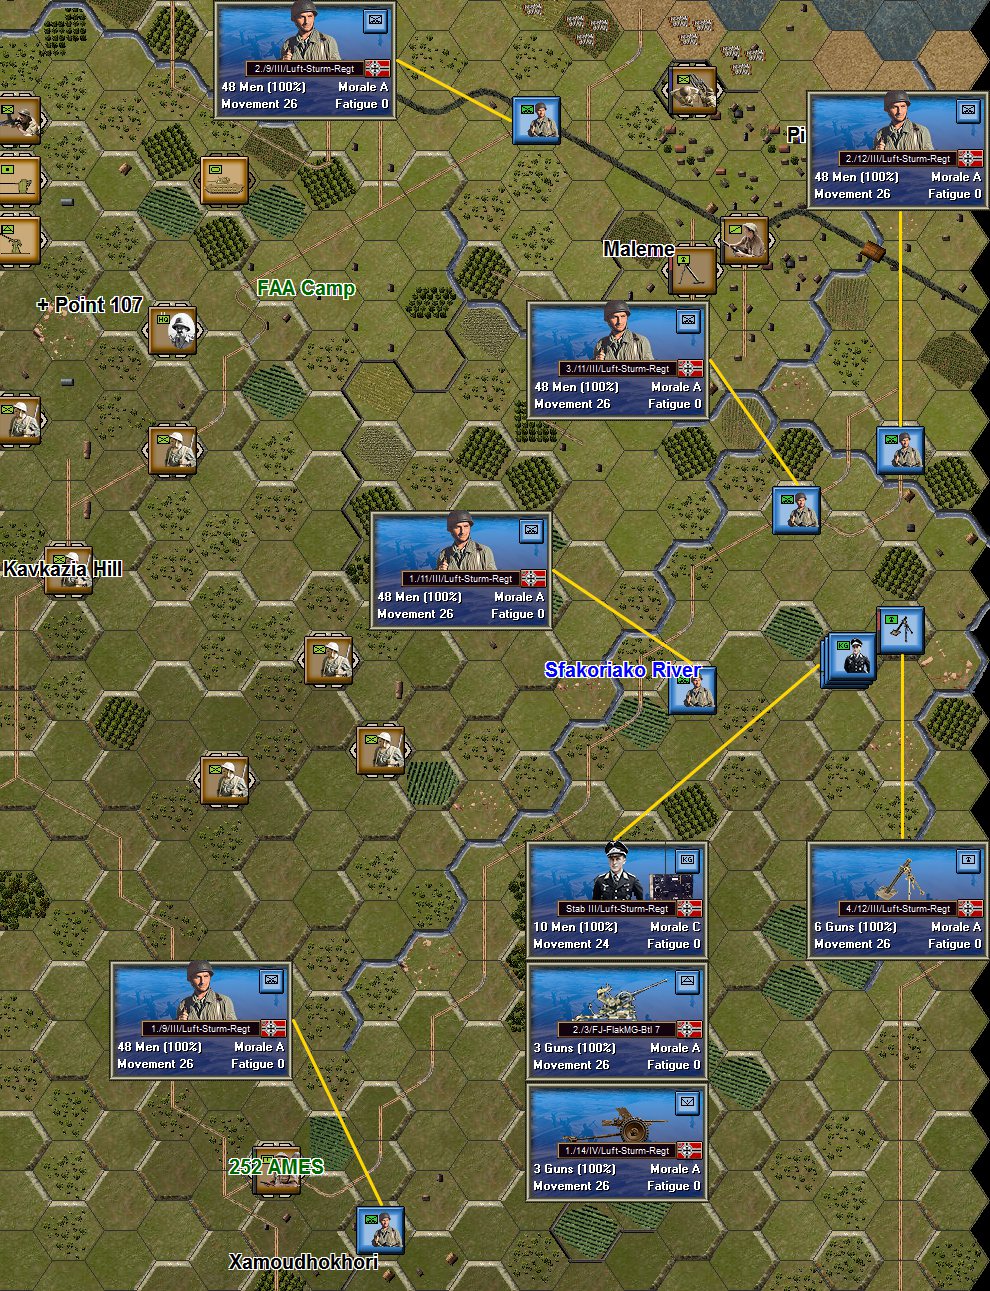
Though not in our Maleme airfield scenario, 21st & 23rd Battalion are just to the east, they would make it significantly more difficult for III Battalion to land if they were present.
With the variable probability for landing, all the German forces should be on the ground no later than 11am - two and a half hours (five turns) after the scenario starts.
The Luftwaffe air assets available in scenario are represented by two units of Stukas;
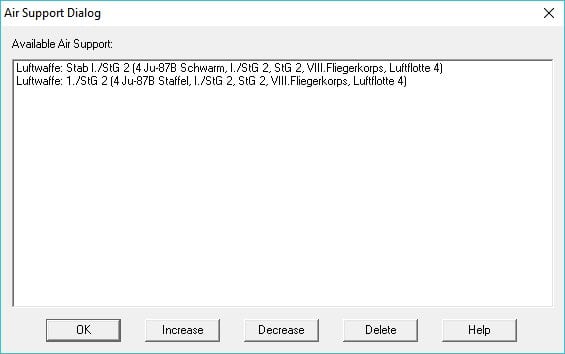
There was significant German airpower at Maleme, but a lack of radios and many of the Fallschirmjaeger identity panels falling into Allied hands made it difficult to use effectively. Providing only two strike units reflects the difficulty of their use.
With the Axis forces laid out, that concludes this blog entry. The final post in this series ‘So you want to design a wargame?’ will cover off the final decisions when creating a scenario as well as balancing and play testing the battle.


Leave a comment