

Vehicle Graphics for Maleme, Crete and Beyond
In the last blog entry we took an in depth look at what was involved in creating unit cards for men based formations. Like the colourised photos shown previously, we have a number of approaches and techniques for the other in game graphics
This blog entry will take you through what’s involved in creating vehicles in game.
All our vehicles are built up from line drawings rather than the photographs used for men. The main rationale is that photos are rarely taken from the same angle and using photographs results in a lack of conformity. With a preference for side on images for vehicles, it is easier to use consistent drawings.
We usually start with a grey scale image – that can be coloured up to the base colour required. Below is the sketch of the Matilda II tank that was present at Maleme airfield in grey scale, as well as two different base colours applied.

The finished Matilda II for Maleme doesn’t adequately show all the steps we go through to create a vehicle, so we will use some examples from one of our prior games – Panzer Battles, Kursk - Southern Flank.

For all our Panzer Battles games, we try to build our vehicles in a modular fashion. Many of the combatant’s vehicles operated a broad range of different environments and we needed to be able to reflect the differences in terms of equipment, configuration, camouflage and markings each vehicle had.
For example, the Germans fought in every theatre (other than the Pacific) and their various vehicles looked different in each due to the environment, time of year and camouflage required.
Below is a grey scale PzKw III J. Following that is a yellow base coloured version that could be used in either the desert or Russia.

In Russia in particular, additional plates were added to vehicles to protect against anti-tank rifles as well as HEAT charged weapons such as panzerschrecks and bazookas. Plates can be built up as a component that can go over a vehicle in various configurations. Here are both turret and hull plates;

Using these kinds of plates, allow a staggering array of individualised vehicles to be created. Here are some examples;

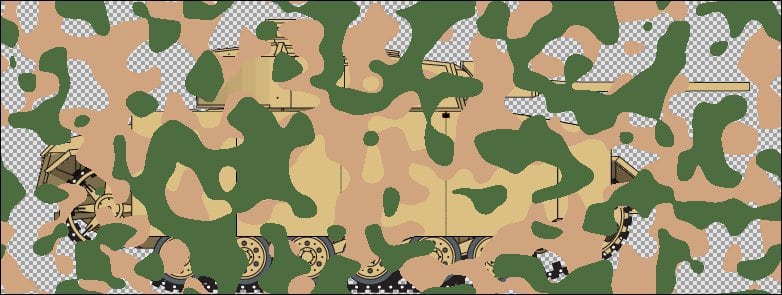
One of the really cool things about Photoshop and its offspring is the great filters that can be used. Camouflage by VanDerLee is a great example. It allows you to mix up to eight different colours in a dazzling range of size, blur and pattern. Any colour can be used and even the order of overlay can be determined. Creating a camouflage layer to overlay a vehicle is quick and easy;

Here is our PzKw III J with the camouflage layer overlaid;
And after changing the blending type to ‘Multiply’;

Adjusting the opacity setting down;
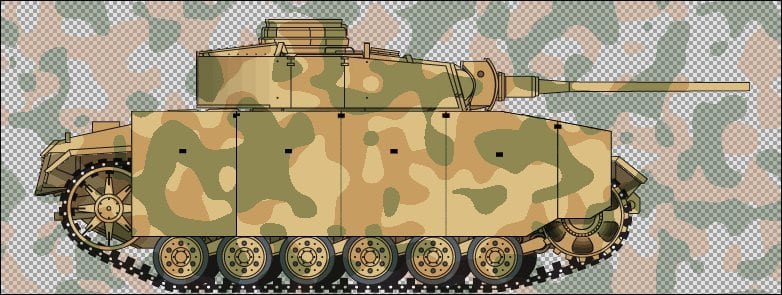
And then trimming all the superfluous ‘over spray’ after merging the layers;

The next step is to add decals and other identifying markings. There are many sites on the web where authentic markings can be sourced;
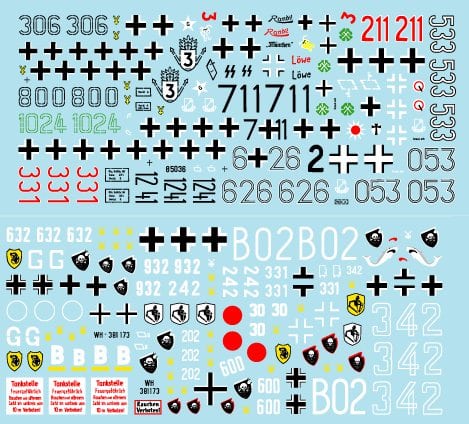
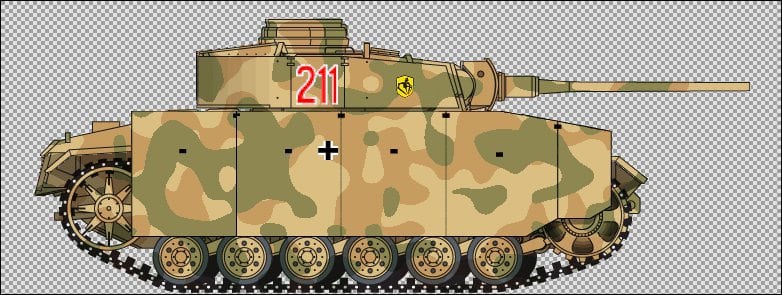
And after application, here is our finished vehicle;
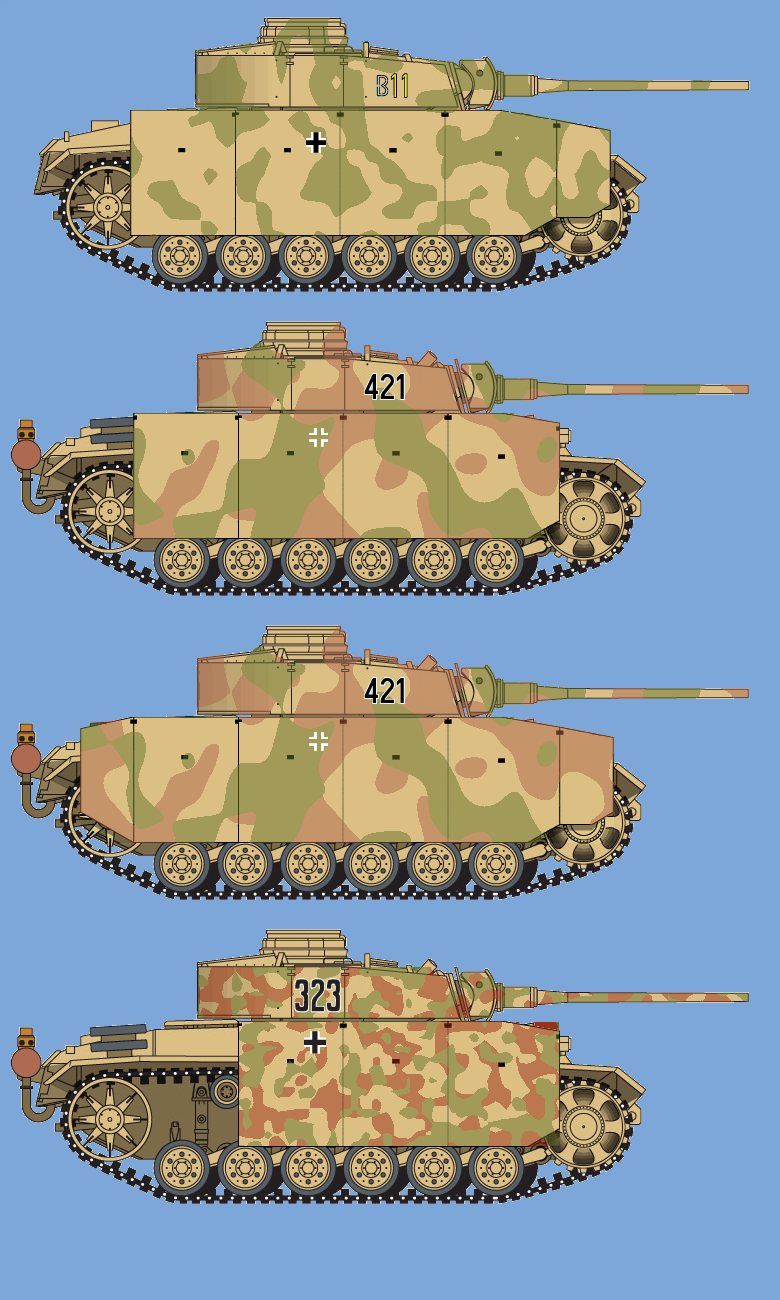
For comparison here are some actual variations of the above tank type that were included in Kursk;
The vehicle ‘silhouettes’ end up as both the unit card and one of the selectable counter sets. Here are some examples;

The other counter set used is ‘top down’. Almost as much work is put into these as the side views.
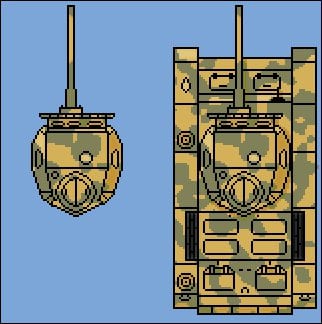
One of our artists (Richie61) builds the top view for a vehicle. Using our PzKw III J as an example, here is the vehicle before and after applying camouflage;

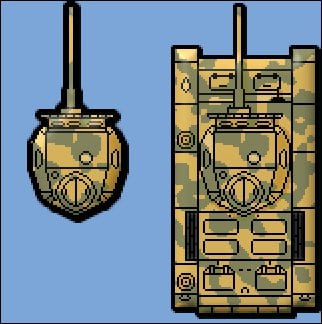
The turret is then separated from the hull as follows;
Both the hull and the turret are given drop shadows. Both are then outlined, with the turret given a wider shading;

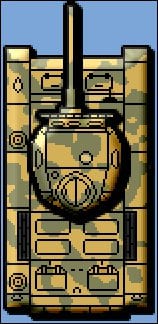
Finally, both the turret and hull are bevelled to give more of a ‘3D’ look;
When combined, we have a finished vehicle that looks like so. The outlines are accentuated because when the image is shrunk, many of the features are lost. Highlighting the hull and turret maintain the basic shape;
To prepare to place the vehicle onto the counter it has to be orientated in the general direction of the fighting. Here the vehicle has been rotated to 40%;

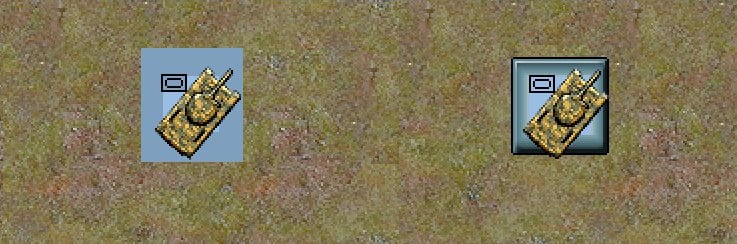
And finally here is the tank shrunk down to approximately 40 x 40 pixels. The first image shows it put on to the ‘graphic background’ with the embedded NATO symbol. To the right is the top down counter in game. It’s obvious how much detail is lost, but the basic shape and turret are still evident;
When doing open topped vehicles, additional depth can be done by ‘reverse’ bevelling the interior. The interior is separated from the vehicle and ‘given depth’ and then included back into the model. You can see below how effective this is with the below German Wespe self-propelled artillery piece – the final in game model is on the right;

To wrap up this blog post here is an example of the silhouette/side on counters in game;

And the same screen shot with the top down counters;

I hope this blog entry, when read concurrently with the previous blog on infantry centric graphics, gives some idea of the work involved in creating in game unit cards and counters. Everything is done by hand and every unit has a third counter set with traditional NATO only counters.
The next blog post will be to go through the setting up of our Maleme scenario.


Since I’m just now catching up on this news, I’ll mention PzKw III J briefly. Technically, the PzKw IIIs featured in this news are not only the ausf J, but also the ausf M. This means that the one with the brown wading muffler mounted on the rear of the tank is not a PzKw III J, but a PzKw III M.
Leave a comment