

Wargame Design Studio – 2018 Half Yearly Report (Part One)
Hi there,
It’s crazy to think that half the year has gone already. We set lofty goals of what can be achieved each year, but the pace always seems to stay the same.

The plan is to publish an update on our current projects over the next couple of blog posts. You can expect updates on Panzer Campaigns, the Civil War Battles series and for this first entry; Panzer Battles.
Three months ago, in March we provided our latest update on North Africa 1941. That update covered off the included campaigns (and scenarios already completed), examples of some of the order of battles, a showcase of the maps and introduction of the new variable victory points.
With the first round of Civil War Battles updates released in June and all the Eastern Front Panzer Campaigns out by March, we have been able to double down on materially moving North Africa forward.
I’m happy to say that we have got a lot of work done in the last couple of months. Back in March we showed you a listing forty-five playable scenarios. As of today, we now have seventy-six scenarios completed. The full listing is below;

Operation Crusader has an additional five scenarios expanding the available situations to eighteen. Tobruk has a further two, with eight scenarios now complete. Operation Brevity & Crete are currently unchanged. Sonnenblume has a single additional scenario, but the Mersa Brega quartet have been completely redone based upon the Julian Shales book that we highlighted in our June 2017 blog posts. Players who have the demo will notice the difference with the latest versions.

http://www.armourpublishing.co.uk/outlinevolume1.html
Operation Battleaxe has just been started and the master three-day scenario is close to completion. I expect there will be four to six scenarios for this operation. Finally, there has been sixteen scenarios added for Operation Compass. Compass was a theatre wide battle covering two months and unlike Brevity and Battleaxe (two and three days respectively), covers four different battles in total.
The Operation Compass battles have turned out (surprisingly) well. The four engagements covered are the initial melee in Egypt, called the Battle of the Camps, the assault on Bardia, the attack on Tobruk and the destruction of the Italian 10th Army at Beda Fomm. These are all very different situations and the Panzer Battles system seems to handle the variability.
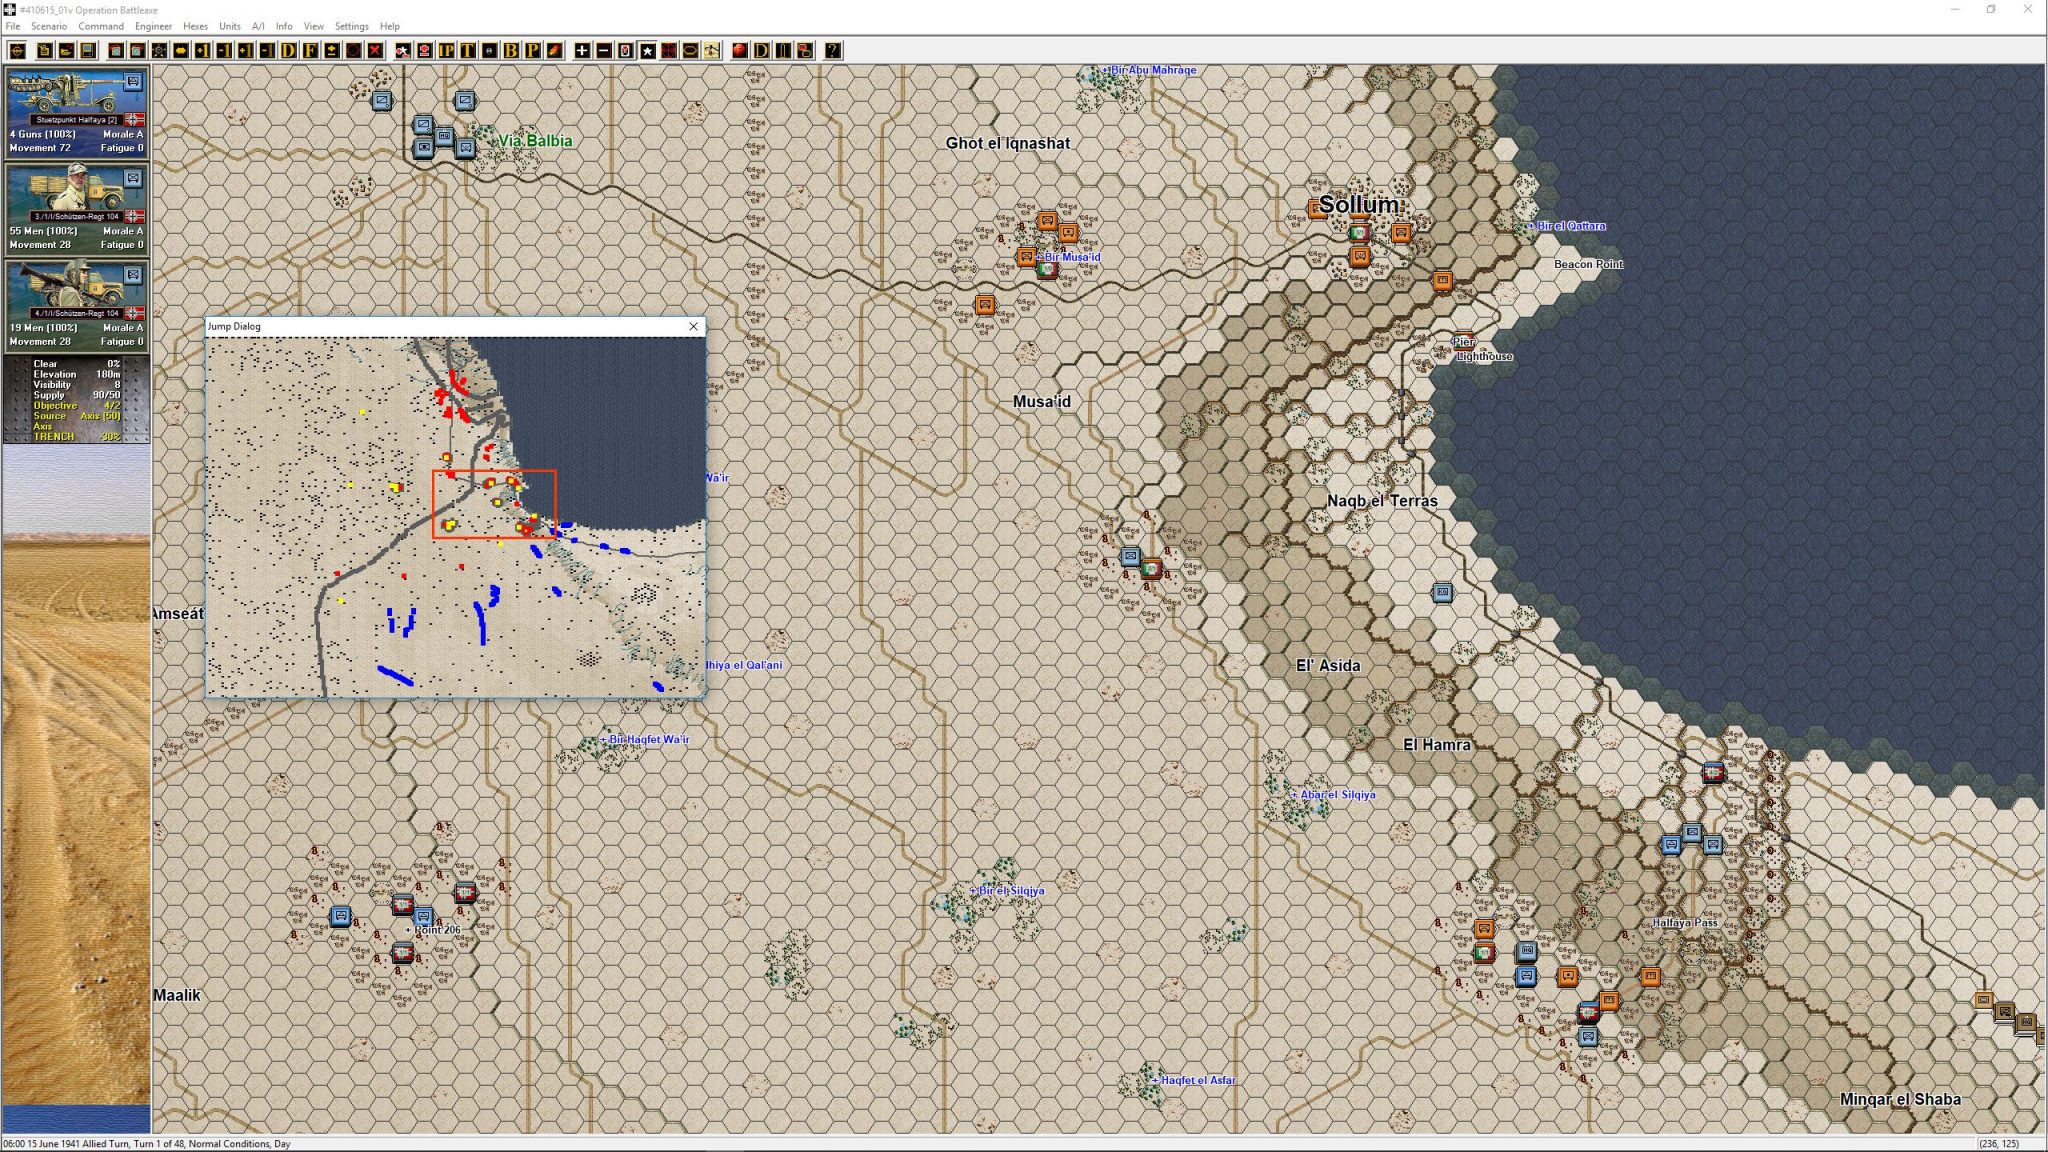
For Beda Fomm, a new map was created, that stretches from just south of Benghazi to just north of Agedabia. The jump map will give you some idea of scale. (All screens can be clicked for full size)


The Operation Compass scenarios in the main work well against the Italian AI. The attacks at Nibeiwa, Tummar and Sidi Barrani are challenging as the Allied player vs the AI, but also a great showcase for why the Matilda II tank was called the ‘Queen of the Desert’. The 7th Royal Tank Regiment dominates these early scenarios


The fortress assaults at Bardia and Tobruk really demonstrate the many ways the new variable victory points can be used.

In Bardia and Tobruk, the Australians used a breach and broaden strategy. A Brigade of three battalions essentially broke through the defences and had a battalion push to the right and a second to the left to expand the break-in, clearing the defences as they went. The third battalion usually pushed into the fortress to create depth for the attackers, ideally take out any supporting artillery batteries and prevent the Italians from counterattacking. The variable victory points coerce the player to follow this historical approach by having every Italian defensive position accrue points for the owner each turn. In Bardia there are seventy defensive positions and the Italian player receives one point for each. This means a reduction in the Allied points by seventy points (!!) every turn. The counter balance is that Allies receive three points for every captured fortification. Taking eighteen locations will neutralise the Italian reduction (18 x 3 = 54 vs 70 - 18 = 52 for the defenders) and every location after that provides a positive lift. If the Australian player doesn’t focus on clearing sufficient fortifications, he will lose.

Tobruk works in a comparable manner to Bardia but has some additional surprises such as dug in Italian tanks and a much bigger area to subdue.

Beda Fomm as previously mentioned has its own very large map. The whole premise of the scenario is to get as many Italians off the map as possible. The British only have the equivalent of a weak division to stop the Axis player. The historic showdown near the ‘Pimple’ can feel like the ‘thin red line’.


There were so many interesting possibilities at Beda Fomm, that we have made a variable scenario of this action.
The Italian player has his initial forces on the coast road but can choose to bring the following troops on in other locations. This will require the British to determine the various axis of advance and try to block the retreating Italians. This variability should make a very good head to head scenario.

The other completed variable scenario is for Operation Brevity where the British can decide the ultimate aim of the operation.

The new variable victory points help here and a new ‘hidden value’ feature has been added. When fog of war is on, players can only see the value that pertains to their own side. There is no way to see what value the other side is receiving. Below you can see the different iterations for Sollum, from a British perspective and then the value the German player sees. This hidden approach allows us to ‘hide’ what decision a player has made by ensuring the other player can’t see the various changes in weightings.
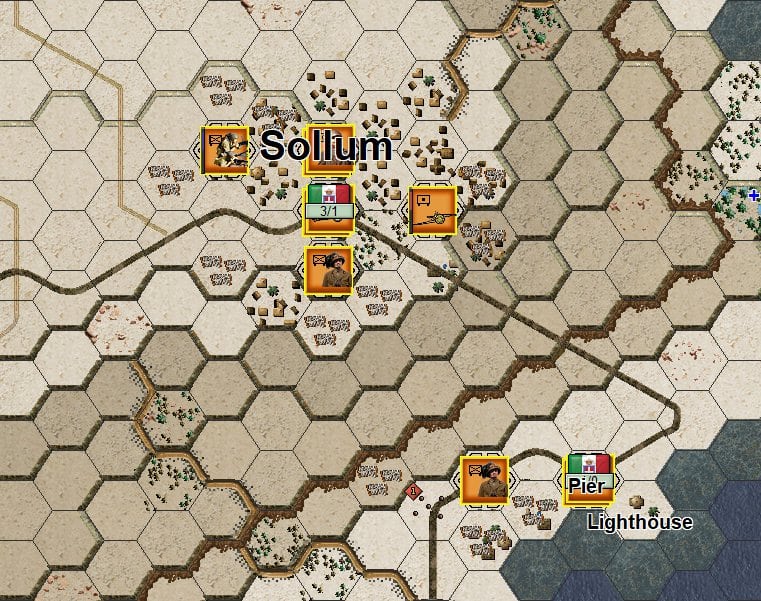
Note the 4/1 objective below and compare to the 3/1 above;

And here is what the Germans see in play;

There is a possibility we may create a similar variable scenario with Operation Battleaxe, but it is early days for that series of scenarios.
We are now coming into the home stretch for North Africa. What’s left to do? We still have to finish Battleaxe and Crusader, decide whether we will do any more variable scenarios (and possibly a campaign), finish the scenario testing and get all documentation completed. That said, a lot has been done in the last couple of months and I’m hopeful we can maintain the pace. Future Panzer Battles titles are not being discussed until we get North Africa 1941 out.
From my perspective, the Panzer Battles system works extremely well in the desert environment. The testing has shown some solid historical alignments and that there were some pretty similar match-ups. My latest testing has been of 88’s at Halfaya Pass in Operation Battleaxe. It’s not pretty for the Matilda’s and as was historical, their ‘Queen of the Desert’ moniker was short lived…
Here are a few more shots from the game;
Tobruk, the Axis attack that breached the western fortifications;

Operation Crusader, November 25th, 1941 - Fighting around the Blockhouse

Operation Battleaxe - 11th Indian Brigade preparing to take Halfaya Pass back;

Beda Fomm - Combeforce arrives just in time;

Included map of the Tobruk defences;

One of the campaign engine screens;

One of the Victory screens;

I hope this has been an informative post and we will post the next half year update soon.
Thanks!


Leave a comment